In this guide, we will walk you through the process of transforming the Brainy Pi device into a Matter lighting device. Matter, formerly known as Project CHIP (Connected Home over IP), is an open-source standard that aims to simplify smart home device connectivity. By implementing this application, you can leverage the power of the Matter ecosystem for seamless integration and control. Let’s get started !
Hardware Requirements for Matter on Brainy Pi
Before we begin, let’s ensure we have the necessary hardware:
PC running Ubuntu 22.04
BrainyPi
1x LED
1x 220 Ohm Resistor
Connecting the LED to Brainy Pi
Connect the LED to pin 38 of the GPIO, as per the given diagram below.
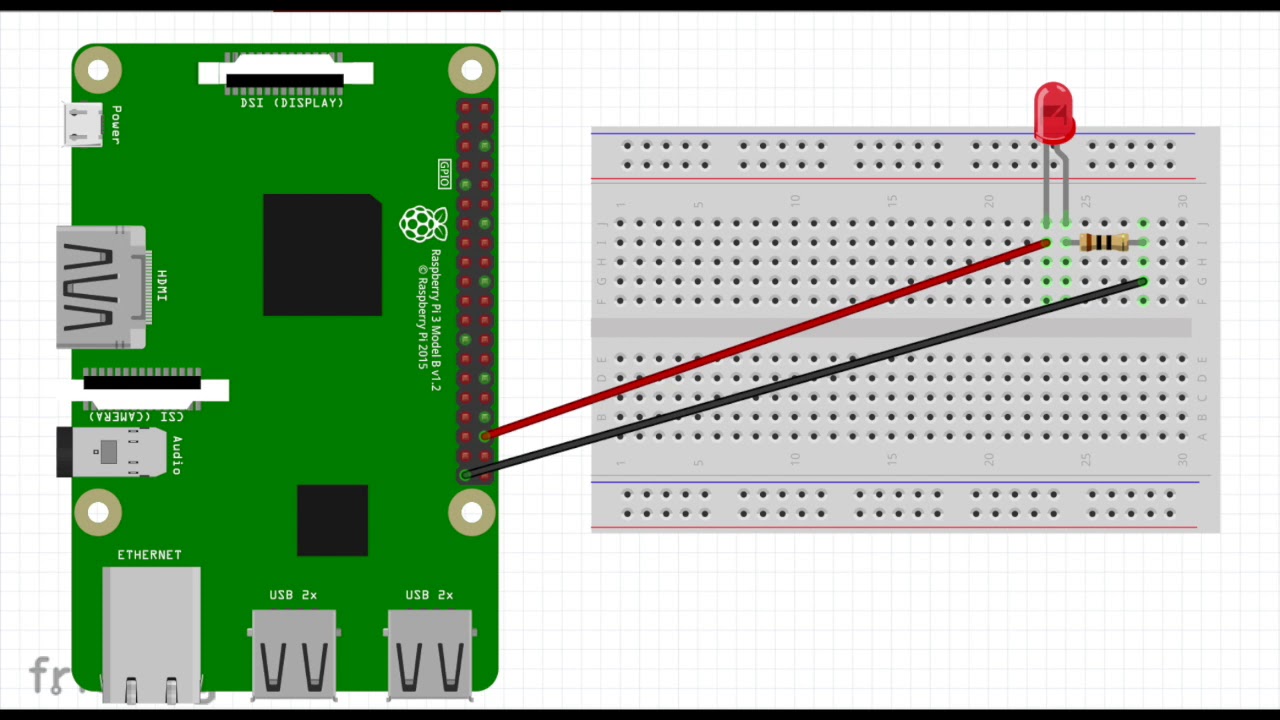
Note: This diagram is for Raspberry Pi but since the Brainy Pi is pin compatible with Raspberry Pi, these connections should work.
Installation
First, we need to install the Matter application. Follow these steps:
SSH to the Brainy Pi and install the package:
Make sure to read the instructions for other possible configurations, such as changing the default passcode (e.g., 20202021).
Start the the application service:
You can monitor the application logs with:
This will help you troubleshoot any potential issues during the installation process.
Commissioning
Now that the Matter application is up and running, we can proceed with the commissioning process using a controller. Here’s what you need to do:
Install the Matter controller, chip-tool, on your PC:
This CLI controller will enable us to interact with the Brainy Pi – a single board computer as a Matter device.
Ensure that the Brainy Pi and your PC are connected to the same network. We will leverage DNS-SD to discover the Brainy Pi’s IP address automatically.
Grant the necessary access to chip-tool for service discovery via DNS-SD:
This step enables the controller to discover services without manually entering the IP address.
Initiate the pairing process:
Here, “110” represents the node ID assigned to the Brainy Pi, and “20202021” is the default setup passcode.
If the pairing process fails, it could be because the device stopped listening to commissioning requests. In such cases, try restarting the Brainy Pi with the following command:
Now you’re ready to control the lights !


