Brainy Pi

Available to select audience (currently beta)

If you have ever considered creating a personalised website for your business, content management, community or non-profit organisation, you may have been deterred by the thought of having to learn how to code. However, there is a solution: Joomla on Edge: Brainy Pi – Raspberry pi Alternative.
Joomla is a content management tool that enables users to design and maintain web-based applications or websites without writing code. It offers tremendous flexibility, enabling users to manage different types of web content, from traditional websites to discussion forums.
This blog explains Joomla installation on Brainy Pi – Raspberry pi Alternative with simple steps. Let’s go !

Required Components to Install Joomla

You only require a few supplies to set up Joomla.
  1. Brainy Pi
  2. ethernet or Wi-Fi
  3. SD card/ hard drive

Step 1: Update the System Software’s

Before installing any on PI we should first update the system
Terminal
sudo apt update
sudo apt full-upgrade

Step 2: Preparing Your Brainy Pi for Joomla

Before installing Joomla, we have to install some additional software and configuring it
  1. NIGNX web server
  2. PHP
This is required because Joomla is written in PHP, so we need that to execute its scripts. NGINX is used to serve the content that is generated from Joomla’s PHP scripts.
To install PHP, use the command.
sudo apt install php7.4-intl
To install NIGNX use the command.
sudo apt-get install nginx

Step 3: Configuring NGINX for Joomla

we will start by Creating a NGINX Virtual Host for Joomla
A virtual host is what NGINX uses to understand how to process incoming web requests. For example, using this file, we can tell NGINX that we want PHP to process the files where Joomla is stored on our Brainy Pi – Raspberry pi Alternative.
1. Open the nano text editor by command
sudo nano /etc/nginx/sites-available/joomla.conf
2. Copy and paste the following text into this file.
server {
    listen 80;
    listen [::]:80;
    root /var/www/joomla;

    index index.php index.html index.htm;
    server_name _;

    client_max_body_size 100M;
    autoindex off;

    location / {
       try_files $uri $uri/ /index.php?$args;
    }

    # deny running scripts inside writable directories
    location ~* /(images|cache|media|logs|tmp)/.*.(php|pl|py|jsp|asp|sh|cgi)$ {
return 403;
error_page 403 /403_error.html;
}

location ~ .php$ {
include snippets/fastcgi-php.conf;
fastcgi_pass unix:/var/run/php/php7.4-fpm.sock;
fastcgi_param SCRIPT_FILENAME $document_root$fastcgi_script_name;
include fastcgi_params;
}

# caching of files
location ~* \.(ico|pdf|flv)$ {
expires 1y;
}

location ~* \.(js|css|png|jpg|jpeg|gif|swf|xml|txt)$ {
expires 14d;
}
}
use CTRL + X, then Y, followed by the ENTER key to save the file
With this setup, we have configured the virtual host to run regardless of the server name
As we created this file within the “sites-available” directory, we must create a symbolic link for the config into the “sites-enabled” directory.
sudo ln -s /etc/nginx/sites-available/joomla.conf /etc/nginx/sites-enabled/joomla.conf
If you aren’t using this alongside a domain name, you will need to remove the “default” virtual host from the “sites-enabled” directory.
You can delete this file by running the following command on your device.
sudo rm /etc/nginx/sites-enabled/default

Step 4: Creating the Database for Joomla on Briany Pi

1. To create this database, we need to log in to our MySQL database server.
sudo mysql -u root -p
2. Now that we are within the MySQL command-line tool, we can now create the database. For this tutorial, we will be keeping this simple and calling the database “joomladb“.
You can create this database by using the following SQL command within the command line
CREATE DATABASE joomladb;
3. After creating the database, we need to make a user that has permission to access it. This user is what Joomla will use to access the database.
CREATE USER 'joomlausr'@'localhost' IDENTIFIED BY '[PASSWORD]';
When you enter this command, make sure that you replace “[PASSWORD]” with a secure password of your choosing.
4. Finally, we need to grant privileges to our new user so that it can access the database that we created.
GRANT ALL PRIVILEGES ON joomladb.* TO 'joomlausr'@'localhost';
5. For our changes to the privileges to take effect, we need to flush the privileges.
FLUSH PRIVILEGES;
6. This was the last step and after this we can quit out of MySQL command line using.
 quit;

Step 5: Installing Joomla on the Brainy Pi

1. create the directory where we will be storing Joomla on the Pi.
You can now create the directory and move into it by using the following two commands in the command line.
sudo mkdir -p /var/www/joomla
cd /var/www/joomla
2. Download Joomla using command
sudo wget https://downloads.joomla.org/cms/joomla4/4-0-3/Joomla_4-0-3-Stable-Full_Package.tar.gz
3. As this is a “.tar.gz” archive, we can use the following tar command to extract its contents.
sudo tar -xvf Joomla_4-0-3-Stable-Full_Package.tar.gz
4. you can remove the zip file now as we dont require them now
sudo rm Joomla_4-0-3-Stable-Full_Package.tar.gz
5.Before running through the Joomla installer on our Brainy Pi, we need to correct some permissions. you can do that using command
sudo chown -R www-data:www-data /var/www/joomla*
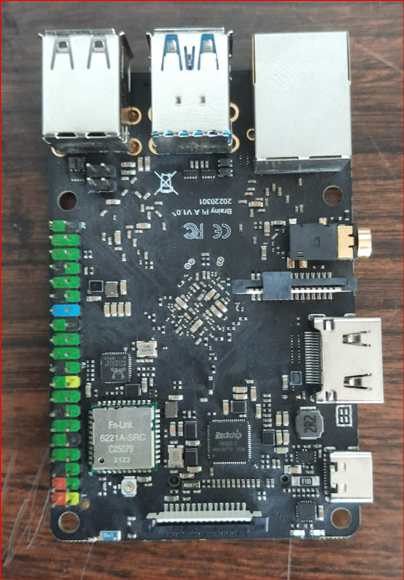
With this, we have successfully installed Joomla in our Brainy Pi and now we are ready to use its web interface.

Step 6: Using Web Interface on Brainy pi

1.To use web interface, we need IP address of our pi. you can get ip address of your pi using
hostname -I
After this you can go to your favorite web browser and search for
http://[YOUR BRAINYPI IP ADDRESS]
After this the web interface will open

Step 7: Initial Setup

1. Start by typing in a name for your website in the textbox
Click on setup login data.
2. After this you have to fill Login data and then click on setup data
3. Now on the next step we have to enter our Brainy Pi’s MySQL server details for Joomla to connect to it.
  • Make sure that you have the password for the SQL user we created earlier on in this guide, if you are following our guide, should be “joomlausr“.
  • Next, you will need to type in the password for that SQL user.
  • Finally, we need to enter the database name for the SQL database we created earlier. If you have been following along with our guide, this should be “joomladb“.
  • After checking Database configuration once you can click on Install joomla
  • To go to the admin screen quickly, you can click the “Complete & Open Admin” button.
  • After this, you will be taken to the login window where you have login using super user account you just created

Step 8: Joomla Dashboard on Brainy pi

You now have access to the Joomla dashboard running on your Brainy Pi.

Endnotes

Now that we have installed and setup joomla successfully on Brainy pi – Raspberry pi Alternative, You can explore the entire dashboard and settings and you will automatically get to know how to use it as it is very simple and easy. you can use this dashboard to create and manage content on your website.
For example, I published sample article on my own personal website you can similarly put anything on your website you can personalize and add security layers on them.
Joomla also ensures best privacy as it is one the most important aspect in the world of the internet.
0 Comments

Leave a reply

Your email address will not be published. Required fields are marked *

*