If you’re a developer looking to integrate an intelligent assistant into your project, you may want to consider using the ChatGPT API on Brainy Pi from OpenAI. With ChatGPT, you can build chatbots, virtual assistants, and other conversational interfaces that can understand natural language and provide intelligent responses.
In this blog post, we’ll walk you through the process of using the ChatGPT API on Brainy Pi, a popular platform for building IoT projects. By the end of this post, you should be able to build your own intelligent assistant using ChatGPT and BrainyPi.
Getting Started
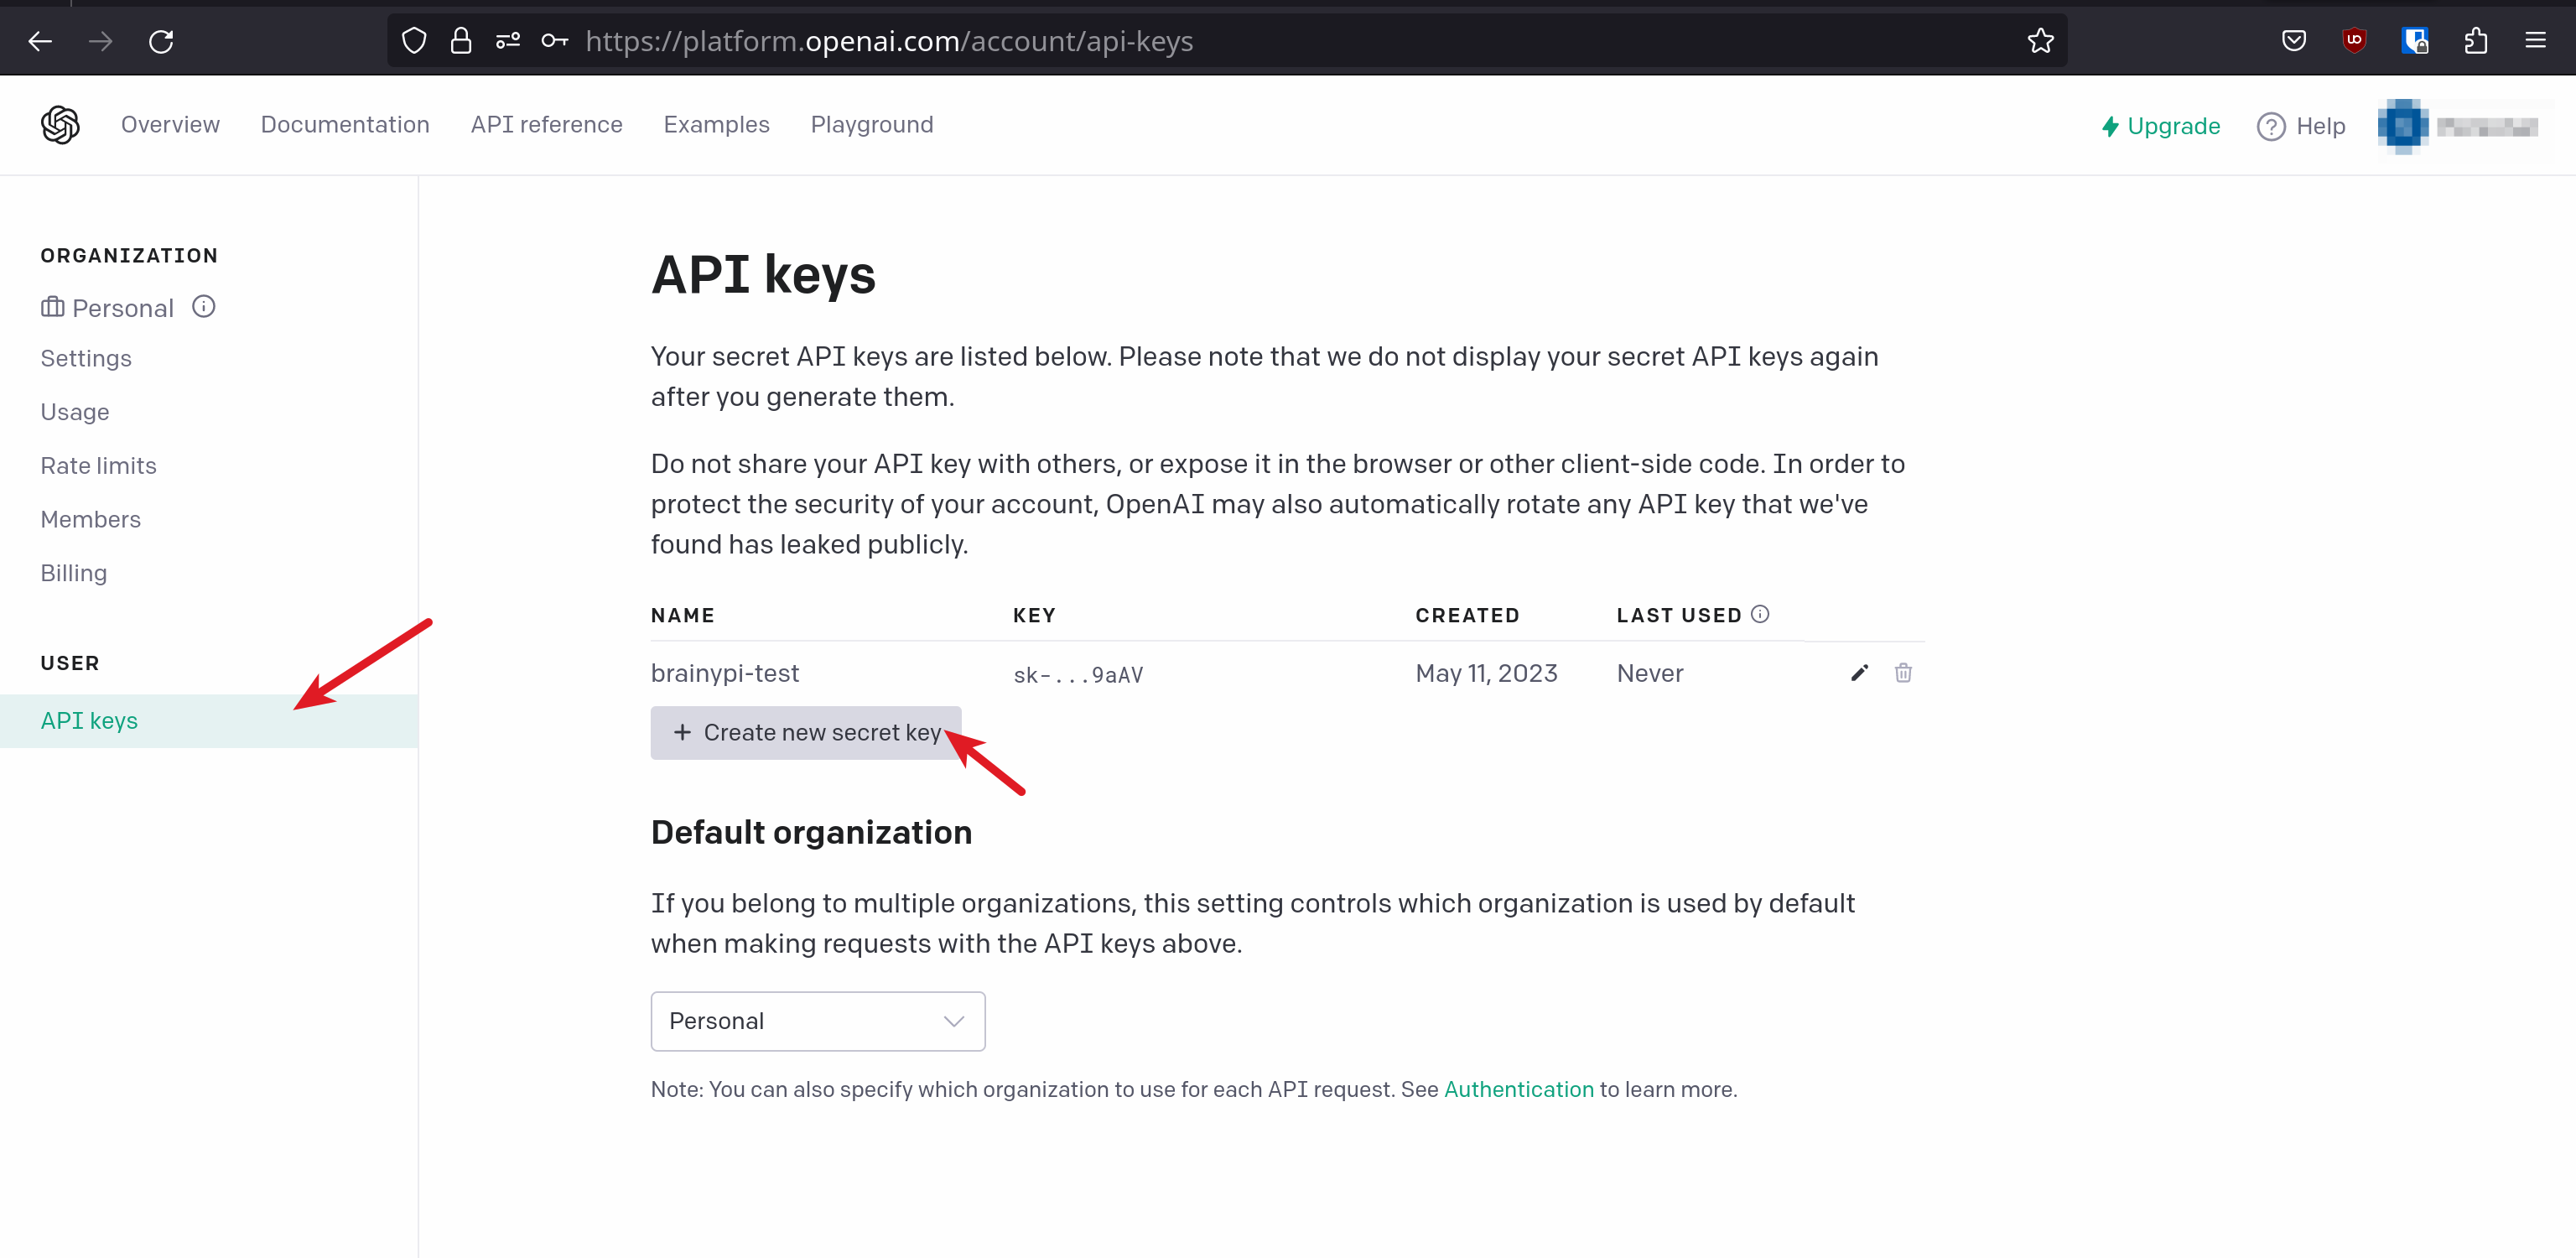
Before you can start using ChatGPT API on Brainy Pi, you’ll need to sign up for an OpenAI API key.
Go to the link
Login into the ChatGPT website.
Go to “API Keys”, Click on “Create new secret key”.

Copy the newly generated secret key. This key will be used to communicate with the API.
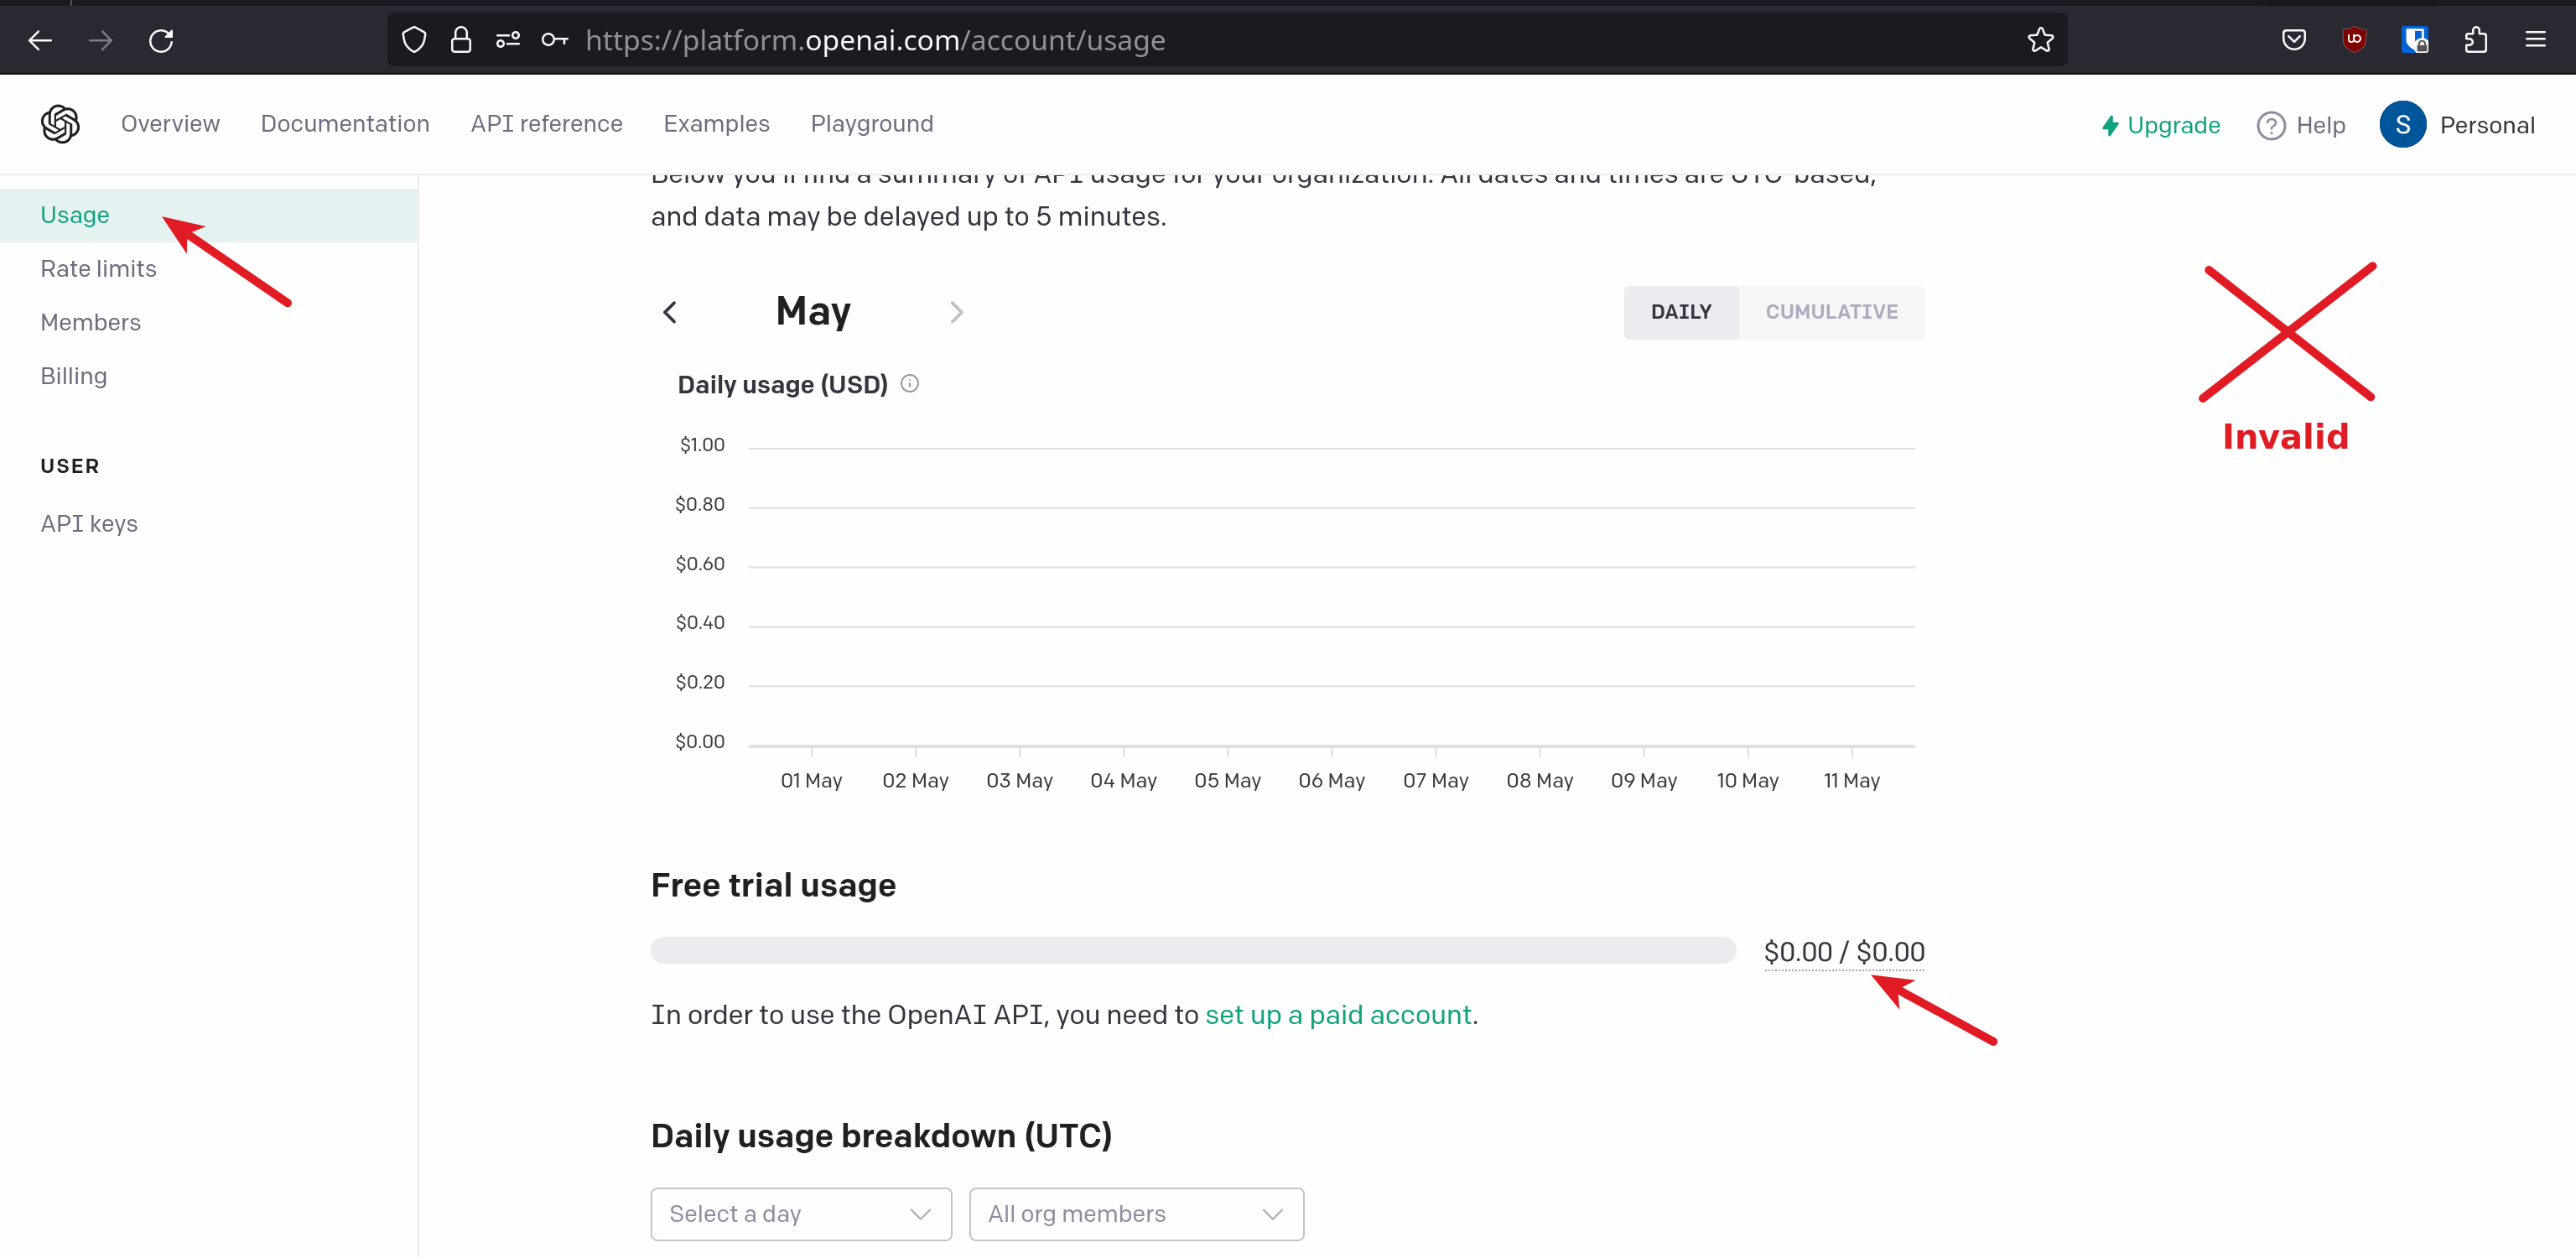
Check if you can use the ChatGPT API.
Invalid ❌
Valid ✅
If you have an invalid account they you have to pay to enable this feature.


Installing dependencies
Once you have your API key, you can install the OpenAI Python library using pip:
Creating a Chatbot
You’ll need to import the OpenAI library and set your API key:
You can replace
API_KEYwith your actual API key.Now that you have everything set up, you can start building your chatbot. Here’s an example code snippet that you can use as a starting point:
In this code snippet, we start by initializing a list of messages that includes a welcome message from the system. We then enter a loop that prompts the user for input and appends each message to the
messageslist.Next, we call the
openai.ChatCompletion.create()method to generate a response from the ChatGPT model. We pass in themessageslist as input and specify the model to use (in this case,davinci, which is one of the most powerful ChatGPT models available).Finally, we print the response and append it to the
messageslist so that it can be used as input for the next iteration of the loop.
Final code for ChatGPT on Brainy Pi
Customizing Your Chatbot
Of course, this is just a basic example, and you’ll likely want to customize your chatbot to better fit your needs. Here are a few tips for customizing your chatbot:
Modify the
messageslist to include additional context for the ChatGPT model. For example, you could include information about the user’s name, location, or preferences.Use a different ChatGPT model to achieve different levels of performance and accuracy. OpenAI offers several models with varying levels of computational complexity and performance.
Use the
openai.Completion.create()method to specify additional parameters for the ChatGPT model, such as the maximum length of the response or the presence of specific keywords.Implement error handling to ensure that your chatbot can handle unexpected inputs or errors from the API.


