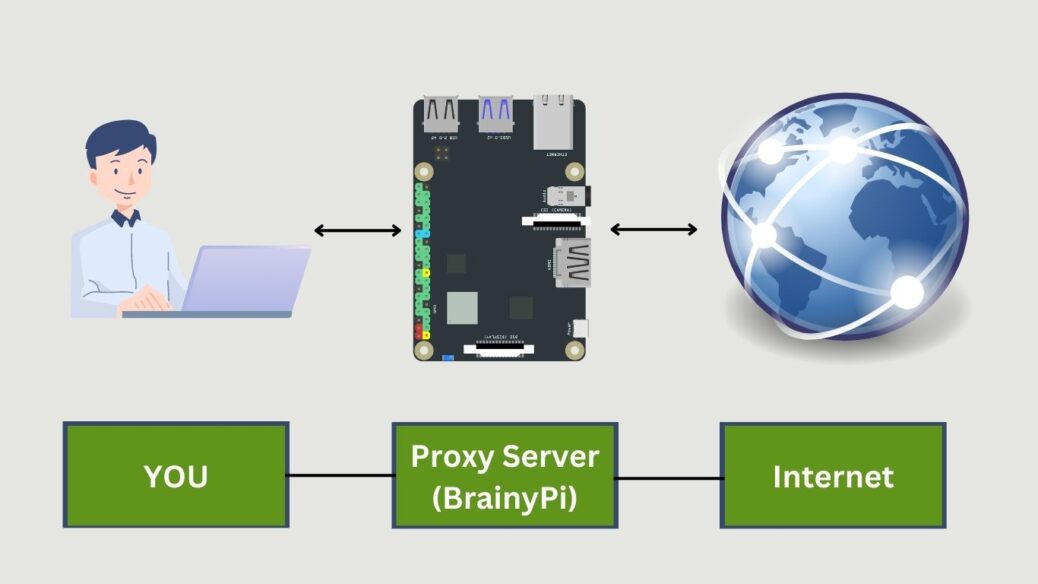
In today’s world, where we rely heavily on the internet to accomplish essential tasks such as online banking, it’s crucial to take our privacy and security seriously. To ensure that we are protected against cybercrimes, utilizing a proxy server or VPN is essential. We will setup Brainy pi – Raspberry pi Alternative for Proxy server.
Using a proxy server is an effective way to protect our privacy online. In this blog we will setup Brainy pi Proxy Server which is designed to provide users with the ability to control their online data and activity. With this, users can block unwanted content, monitor internet traffic, and ensure that their data is secure and private.
Lets go through the following steps to setup proxy server on brainy pi easily.
Required Components to Set Up Proxy Server:
You will need
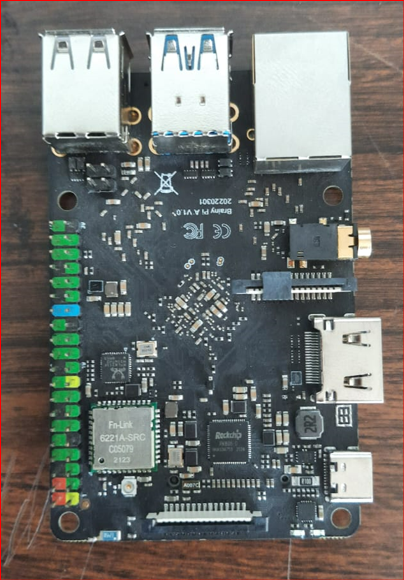
Brainy Pi
Ethernet/ WIFI
Keyboard and mouse for USB
Micro SD card
Step 1: Upgrade Your System and Packages
You should check to see if Rbian(Brainy Pi OS) packages are up to date. To install any new software, it’s essential to update and upgrade the device.
Start your Pi, then type the following in the Terminal
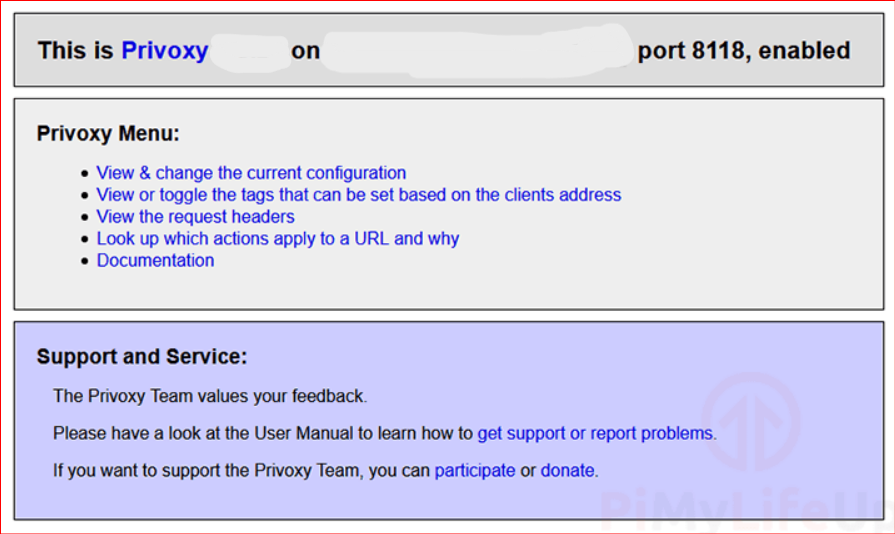
You may now install Privoxy on your Pi device using the command line after making sure the packages are updated:
Step 2: Getting Brainy Pi Ready for Proxy Server
Now that the Privoxy software has been installed, we can modify its configuration to enable external access to the proxy server.
1. We can do this by modifying the file. To modify the file use the command.
2. Look for the following text block in this file. Finding
Replacing them with:
Apply the modifications, then save the file by pressing “CTRL+X,” adding “Y,” and pressing “Enter” at the very end to return to the terminal.
3. You must use the following command to restart the Privoxy server on your Pi device.
Step 3: Testing the Performance of Your Brainy Pi Proxy Server
Before starting this part, we strongly advise you to confirm that your Brainy Pi has a static local IP address.
1. Although the procedure varies from browser to browser, we have included simple tutorials below for three web browsers on locating the proxy settings.
a) Chrome:
Down to the bottom, scroll
To access the advanced options, click “Advanced.”
When you reach the “System” header, scroll down.
Click the option “Open your computer’s proxy settings.”
Then, click the option “Access your computer’s proxy settings.”
b) Firefox:
Open “about: preferences” in the address bar or the Options menu.
To reach the bottom, scroll down.
Under “Network Settings,” click the “Settings…” option.
c) Internet Explorer:
Open Settings.
Choose “Connections” from the menu.
Choose “LAN settings” from the menu.
“Use a proxy server for your LAN” be checked.


