Welcome to the Brainy Pi AI API Examples blog, your gateway to the captivating world of artificial intelligence and computer vision. In this article, we’re excited to introduce you to the mesmerizing realm of pose detection and demonstrate how the Brainy Pi AI API can empower you to create innovative computer vision products. Whether you’re a developer with a passion for AI or an entrepreneur with a vision, this blog is your ticket to unlocking the potential of pose estimation API on Brainy Pi.
Discover Brainy Pi AI API
The Brainy Pi AI API Examples repository serves as your treasure trove of knowledge and inspiration. Here, you’ll find a curated collection of example applications that vividly showcase the capabilities of the BrainyPi AI REST server. From recognizing faces to detecting objects, classifying images, and today’s spotlight—pose estimation—the BrainyPi AI API opens up a world of opportunities.
Getting Started: Installation
Before we dive into the mesmerizing world of pose detection, let’s ensure you have the Brainy Pi AI REST server installed on your Brainy Pi, specifically running Rbian v0.7.3-beta. If you haven’t done so yet, fear not; we’ve got you covered. Follow these simple installation steps:
Open your terminal on the Brainy Pi and execute the following command:
With the Brainy Pi AI REST server ready to roll, let’s proceed to the next steps.
Setting Up the Demo for Pose Estimation API on Brainy Pi
Let’s roll up our sleeves and delve into the Pose Detection Demo using the Brainy Pi AI API. This hands-on experience will not only showcase the technology but also empower you to utilize it effectively.
Step 1: Clone the Repository
Start by cloning our example repository to your local machine. This repository is your treasure trove of example applications that illuminate the capabilities of the Brainy Pi AI API:
Step 2: Install Dependencies
To ensure a seamless experience, install the necessary dependencies by executing:
Running the Pose Detection Demo
Now that we have everything in place, let’s dive into the Pose Detection Demo:
Navigate to the root directory of the cloned repository:
Build the examples by creating a build directory, running CMake, and compiling the source files:
Once the compilation process is complete, you’re ready to run the Pose Detection Demo. Execute the corresponding executable file:
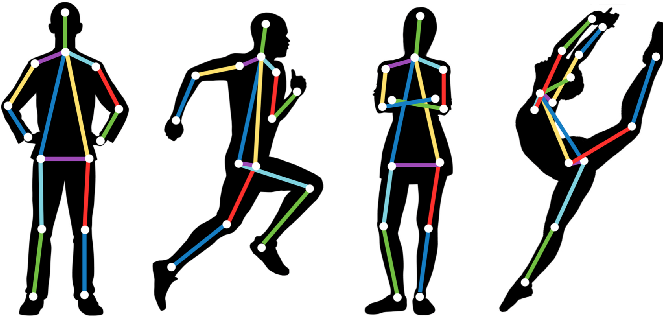
Congratulations! You’ve just experienced the wonder of pose detection powered by the Brainy Pi AI API. Witness how AI and computer vision can analyze and identify human poses within an input image with precision and accuracy.
Explore and Customize
Don’t stop here. Dive deeper into our repository and explore other examples. Customize them to meet your unique requirements and uncover the immense potential of Brainy Pi AI API for various computer vision tasks.
In conclusion, the Brainy Pi AI API empowers developers and entrepreneurs to turn their visions into reality. Whether you dream of building an interactive fitness app, a gesture-based control system, or any other groundbreaking product, the Brainy Pi AI API is your trusted companion. Stay tuned for more exciting examples and tutorials to fuel your creativity and bring your computer vision products to life!

