Brainy Pi

Available to select audience (currently beta)

Syncthing on Brainy pi
Syncthing is a tool that helps synchronise files between many devices such as Brainy pi – Raspberry pi Alternative . It uses a type of encryption called TLS to protect your data while it’s being synced, so it’s harder for bad people to steal it. You can only connect to Syncthing if you have a reliable certificate, so you know you’re safe.
This blog will show you how to install Syncthing on your Brainy Pi.

Required Components

You will need the following to set up synchthing with Brainy Pi:
  • Brainy Pi
  • Ethernet/ WIFI
  • Keyboard and mouse for USB
  • Micro SD card

Step 1: Upgrade Your System and Packages

We must add the project’s PGP keys and package repository as possible sources to install the program.
1. Update the system first, then install the file synchronization program on our Pi.
				
					sudo apt update
sudo apt full-upgrade


Step 2: Get the Syncthing software installed on Brainy pi

The package management may now manage sources that use the HTTPS protocol thanks to this package.
				
					sudo apt install apt-transport-https
				
			
Doing this ensures that the packages we install are legitimate and have valid signatures.
				
					curl -s https://syncthing.net/release-key.txt | gpg --dearmor | sudo tee /usr/share/keyrings/syncthing- archive-keyring.gpg >/dev/null
				
			
We can now add the repository after adding the key to Our Sources List.
				
					echo "deb [signed-by=/usr/share/keyrings/syncthing-archive-keyring.gpg] https://apt.syncthing.net/ syncthing stable" | sudo tee /etc/apt/sources.list.d/syncthing.list


Use the following command to install syncthing  

				
					sudo apt install syncthing
				
			
Before continuing, run the service once to build the configuration files for syncing.
				
					syncthing
				
			
It will generate each configuration file that is required.
This configuration file will continue functioning if we use our pi user to run the Syncthing program.
We can use the nano text editor to modify the configuration file with the command below.
				
					nano ~/.config/syncthing/config.xml
				
			
  • You must locate the following line in this file.
  • CTRL + W is a shortcut for searching.
  • FIND > 
				
					<address>127.0.0.1:8384</address>
				
			
  • Replace with>
				
					<address>"YOUR IP ADRRESSS":8384</address>
				
			
We are limiting access to the web interface to just those on the same local network by utilizing the local IP address, which will protect your privacy.
Instead, you may use the IP “0.0.0.0” to grant access to any address.
After changing the IP, save the file by hitting CTRL + X, Y, and ENTER.
Making and enabling a service for the software is the work at hand. The service will enable Syncthing to start automatically at boot and make it simple to stop and start.

Running the Syncthing on Brainy pi

  • Use the terminal to run the following command.
				
					sudo nano /lib/systemd/system/syncthing.service
				
			
  • Save the text file inside of the current one.
				
					[Unit]
Description=Syncthing - Open Source Continuous File Synchronization
Documentation=man:syncthing(1)
After=network.target

[Service]
User=pi
ExecStart=/usr/bin/syncthing -no-browser -no-restart -logflags=0
Restart=on-failure
RestartSec=5
SuccessExitStatus=3 4
RestartForceExitStatus=3 4

# Hardening
ProtectSystem=full
PrivateTmp=true
SystemCallArchitectures=native
MemoryDenyWriteExecute=true
NoNewPrivileges=true

[Install]
WantedBy=multi-user.target
				
			
 Once all the lines have been inserted, save the file by hitting CTRL + X, Y, and ENTER.
  • You may activate it by executing the following command.
				
					sudo systemctl enable syncthing
				
			
  • To start using the Syncthing web interface, we must first start the service.
  • You may launch the service using the following methods:
				
					sudo systemctl start syncthing
				
			
On our PI, we can use this to confirm that the Syncthing service has begun.
				
					 sudo systemctl status syncthing
				
			
If you see this as the output,
				
					Active: active (running)
				
			
  • You might only have followed the instructions if you understand this. Thus, please double-check each step you take.
  • Need to obtain the IP address of your brainy pi in order to access the web interface.
  • Run the command to acquire the IP address.
				
					hostname -I
				
			
  • You may receive more than one IP address; if this happens, it signifies that your static IP address has not been configured. Therefore, you can use any IP address presented on the terminal.
  • Use web browser to navigate to the following website after obtaining the IP go to
				
					http://[PIIPADDRESS]:8384
				
			
Here, the port number is 8384.
You will be sent to the Syncthing web interface when you visit the website address.

Step 3: Web Interface on Brainy pi

Using Syncthing for Backups On Brainy Pi

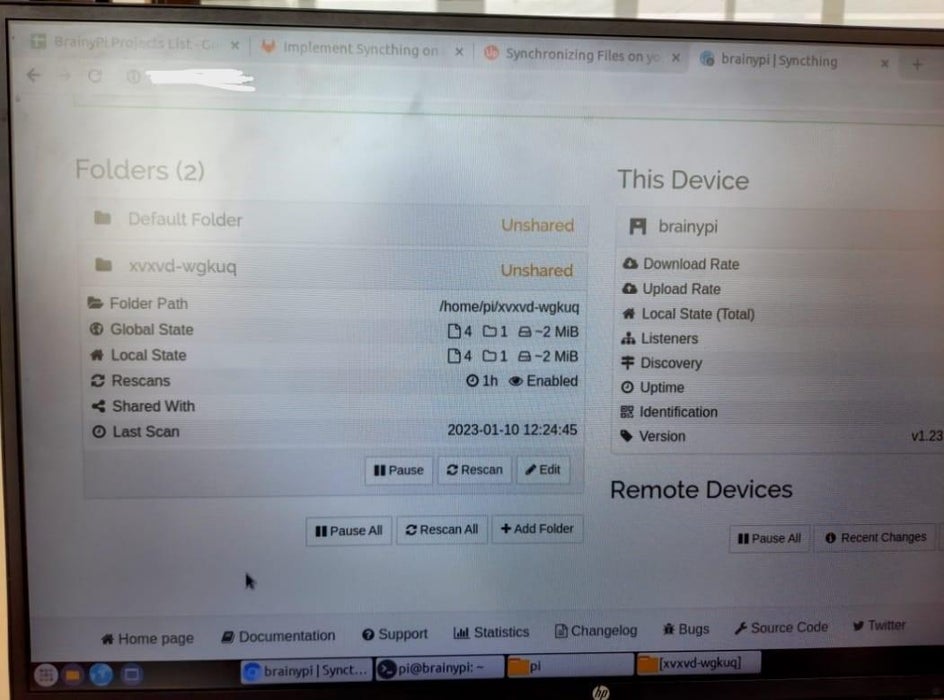
We may now access the web interface at last.
  • Syncthing does not, by default, include a username or password, but any user may access the interface and change their preferences, which indicates this.
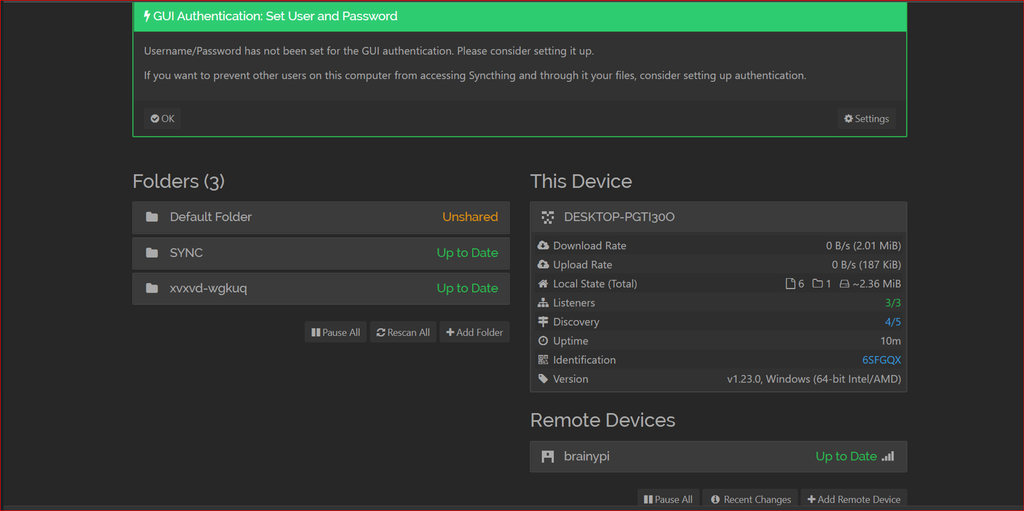
  • A notification will alert you to the risks if have not specified the username and password. Thus, once  username and password setup is done, we must check in before viewing the next screen.
  • Choose the Add Folder button.
  • Be sure to allow sharing so that if you need to take a backup of anything, you must paste your files into the folder you just made, and the program will take the backup for you. This creates a folder on your PI device that you can access and change accordingly.
  • We must install the syncing on the remote device as well in order to add it. In my instance, I used Windows.
  • Open syncing now.
  • Choose the display device ID option from the action menu.
  • Copy the device ID and paste it at the part where you may explore more possibilities.

Using Syncthing for Backups On Brainy Pi

Endnotes

Now we can access duplicate files from many devices after sharing the folders. Many other devices can be used to access shared folders and go around the website on your own and see that there are countless customization choices you can use to make it as unique and personalized as you like while still adding security levels.
Reference: Syncthing 
0 Comments

Leave a reply

Your email address will not be published. Required fields are marked *

*